
Germinating Cannabis Seeds with Unbleached Coffee Filters
Germinating seeds is the first step toward growing strong and healthy plants. You can do this in many ways. One popular and cheap method uses unbleached coffee filters. Many growers like it because it’s simple, low-cost, and often works well.
Coffee filters hold moisture but still allow air to pass through. That balance helps seeds sprout without problems. Compared to soil or rock wool cubes, filters give you more control over moisture. And that matters a lot when you want your seeds to stay alive and healthy.
Using unbleached filters has extra benefits. They don’t contain bleach or chemicals that could hurt your seeds. That makes them a safer and more eco-friendly choice. Plus, they soak up water easily. The filter stays moist without getting too wet. That helps prevent mold or seed rot.
How the Method Works
You only need a few simple things. Most people already have them at home. Wet the coffee filter slightly, then place your cannabis seeds inside. Fold the filter and put it in a warm, dark spot.
The filter keeps the seeds moist. At the same time, it lets them breathe. This balance helps prevent fungus or rot. After a few days, the seeds usually start to sprout.
Both new and experienced growers like this method. It’s quick, cheap, and easy to check on your seeds. You don’t need special gear. Just keep an eye on the moisture and temperature. That’s often enough to get strong seedlings with healthy roots.
Whether you grow for yourself or run a bigger setup, this is a great way to start.
One More Thing…
This method works, but it also has downsides. Germinating in soil avoids many of those problems. We list the disadvantages at the end of this blog. Make sure to read them too. There’s a reason we still recommend germinating seeds directly in soil as the best method.

Part 1 Germinating cannabis seeds using unbleached coffee filters: Materials Needed
To successfully germinate cannabis seeds using the unbleached coffee filter method, gathering the right materials is essential. Each item plays a crucial role in ensuring the seeds sprout under optimal conditions, providing the best start for healthy plant development.
-
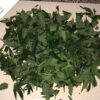
Using unbleached Coffee Filters
Unbleached coffee filters are a key component of this method. Their porous texture allows for excellent water retention while still permitting airflow, which prevents the seeds from becoming waterlogged. The unbleached variety is recommended because it is free from chemicals that could potentially leach into the water and harm the delicate seeds during the germination process. Bleached filters, on the other hand, may contain chlorine or other bleaching agents, which can introduce toxins that interfere with seed development. The unbleached filter provides a safe, neutral environment for your cannabis seeds to sprout.
-
Distilled Water
Using distilled water is highly recommended when germinating cannabis seeds. Tap water often contains chlorine, fluoride, or other impurities that can hinder the germination process. Distilled water is free from these contaminants, providing a pure environment for the seeds. It’s important that the coffee filter remains moist, but not soaked, to prevent seed rot or fungal growth.
-
Two Plates, Small Container with Lid, or a Plastic Bag
You will need two plates, a small container with a sealing lid, or a plastic bag to create a humid environment that retains moisture for the seeds. This helps prevent the coffee filter from drying out too quickly. Whichever option you choose, ensure there’s enough air circulation to avoid mold formation.
-
Tweezers
Tweezers are recommended for handling cannabis seeds, especially after they’ve sprouted. The taproots that emerge during germination are delicate and can easily be damaged by hand contact. Using tweezers ensures the seeds can be safely transferred to their growing medium without harming the fragile roots.
By gathering these simple materials, you’re well-equipped to start the germination process with confidence.

Part 2: Step-by-Step Guide to Germinating Cannabis Seeds Using Unbleached Coffee Filters
Germinating cannabis seeds using unbleached coffee filters is an easy, effective, and inexpensive method that allows you to monitor the process closely. With just a few simple materials, you can create an optimal environment for your seeds to sprout, increasing your chances of success. Below is a detailed step-by-step guide to ensure you follow the process correctly, resulting in healthy seedlings ready for planting.
Step 1 Germinating cannabis seeds using unbleached coffee filters: Prepare the Coffee Filter
Start by preparing the coffee filter, which will serve as the medium for holding moisture and providing a safe environment for your seeds.
- Dampen the Filter: First, take an unbleached coffee filter and dampen it with distilled water. Be sure the water is evenly distributed across the filter so that it is moist throughout, but not dripping wet. A soaked filter can cause your seeds to drown or encourage the growth of mold. To avoid this, gently squeeze out any excess water, ensuring the filter is just moist enough to support the germination process.
The use of distilled water is crucial here. Tap water often contains minerals, chlorine, or other impurities that may negatively affect the seeds’ ability to germinate. Distilled water is free from these contaminants, providing a safe, neutral environment for your seeds to sprout.
Step 2: Place the Seeds
Once the coffee filter is properly moistened, it’s time to place your cannabis seeds inside.
- Position the Seeds: Lay the dampened coffee filter flat on a clean surface. Then, place your cannabis seeds in the center of the filter. Be mindful of spacing—each seed should be placed about an inch apart to ensure that their roots have room to grow without becoming tangled or obstructed by neighboring seeds.
The seeds should be positioned in a way that allows them to have ample access to moisture and oxygen while they begin to sprout.


Step 3: Cover the Seeds
Now that your seeds are positioned in the coffee filter, the next step is to cover them to maintain a moist environment.
- Enclose the Seeds: Gently fold the coffee filter over the seeds, making sure they are fully enclosed in the moist filter. You want to ensure the seeds are snugly wrapped but not crushed, allowing them to be completely surrounded by moisture while still receiving air.
Alternatively, if you’re working with a large number of seeds or want additional moisture retention, you can place another damp coffee filter on top of the first, sandwiching the seeds in between.
Step 4: Create the Right Environment
Once your seeds are wrapped in the moist coffee filter, it’s important to create a controlled environment that encourages proper germination. The goal is to retain moisture while providing airflow and warmth.
- Use Plates, a Small Container, or a Plastic Bag: Place the coffee filter with the seeds inside a sealed container. This could be done by:
- Placing the coffee filter between two plates (with the concave sides facing inward).
- Using a small container with a sealing lid.
- Alternatively, you can put the coffee filter inside a plastic bag. If using a bag, make sure you don’t seal it completely airtight. While moisture needs to be retained, seeds also require oxygen to germinate, so leave a small opening to ensure airflow.
- Maintain Warmth: Store your setup in a warm, dark place, like a cupboard or drawer. Light is not necessary at this stage, but warmth is crucial. The ideal temperature range for cannabis seed germination is between 70-85°F (21-29°C). This temperature range promotes faster and healthier sprouting.
Keeping the environment warm but not hot is key. Too much heat can dry out the coffee filter, while too little warmth will slow down the germination process.
Step 5: Check the Seeds Daily
Consistency is key when it comes to germination, so it’s important to monitor the seeds daily to ensure conditions remain ideal.
- Check Moisture Levels: Every 12-24 hours, check the coffee filter to make sure it hasn’t dried out. If it starts to dry, lightly mist it with more distilled water. Avoid soaking the filter or allowing the seeds to sit in standing water, as this can lead to rotting or fungal growth.
Regularly checking the seeds also allows you to monitor their progress and spot any potential issues early on, such as seeds drying out or signs of mold.
Step 6: Wait for Germination
With the seeds in their moist, warm environment, germination typically begins within a few days.
- Watch for Taproots: After 1 to 5 days, you should begin to see the seeds crack open, with small, white taproots emerging from the shells. These taproots are the beginning of the cannabis plant’s root system and are a clear sign that the germination process is underway.
The length of time it takes for seeds to germinate can vary based on the seed’s genetics and environmental conditions. Some seeds may germinate within 24 hours, while others can take up to a week. Patience is important during this stage—don’t rush the process.

Step 7: Transplant the Germinated Seeds
Once the taproot has emerged and grown to around ¼ to ½ inch in length, the seeds are ready to be transplanted into soil or another growing medium.
- Handle with Care: When handling germinated seeds, it’s important to be gentle. The taproot is very delicate and can be easily damaged. Use tweezers to carefully pick up each seed by the shell (not by the root). Avoid touching the taproot directly to minimize the risk of injury.
- Plant in the Growing Medium: Prepare your growing medium (such as soil, coco coir, or a hydroponic setup). Make a small hole, about ½ inch deep, in the medium. Place the germinated seed into the hole with the taproot facing downward and the seed shell pointing upward. This orientation allows the taproot to grow deeper into the soil while the sprout moves toward the surface.
- Cover Lightly: Once the seed is in place, lightly cover it with the surrounding medium. Don’t compact the soil or growing medium too tightly over the seed, as this can prevent the sprout from breaking through.
- Watering After Transplant: After transplanting, lightly water the growing medium with distilled water to help the seed settle. Be careful not to overwater, as newly germinated seeds are still delicate.
- Patience and Observation: Keep the planted seeds in a warm, moist environment, continuing to monitor them for further growth. Within a few days, you should see the sprout breaking through the soil and growing its first set of leaves (cotyledons).
By following these steps, you can successfully germinate cannabis seeds using the unbleached coffee filter method, giving your plants a healthy start and improving their chances of strong, robust growth.

Part 3: Additional Tips for Successful Germination using unbleached coffee filters
Germinating cannabis seeds using unbleached coffee filters is a simple, cost-effective method, but it requires attention to detail and consistency. To ensure the highest chances of success, there are several important factors to consider. Below are additional tips to optimize your germination process.
-
Water Quality
The quality of water you use can greatly impact the success of germinating your cannabis seeds. Distilled or purified water is recommended because it is free from the contaminants commonly found in tap water, such as chlorine, fluoride, and other chemicals that can inhibit seed germination. Tap water, especially in certain regions, may contain minerals or compounds that could either delay the germination process or harm the seeds. By using distilled water, you provide a pure, clean environment for your seeds, giving them the best chance to sprout successfully.
-
Humidity Control
Maintaining the right level of humidity is crucial during germination. Seeds require moisture to crack open and begin sprouting, but too much water can be just as damaging as too little. Keeping the environment consistently humid ensures that the coffee filter stays damp, but be careful to avoid overwatering. If the filter becomes too wet, the seeds can drown or develop mold, which will prevent successful germination. A good rule of thumb is to keep the coffee filter moist to the touch, but not soaked. The container or plastic bag setup helps retain moisture, but be sure there’s enough airflow to prevent excessive humidity buildup that can encourage mold growth.
-
Patience is Key
Cannabis seeds vary in terms of how long they take to germinate. Some seeds will crack open within 24 hours, while others may take up to a week. This is completely normal, and it’s important to exercise patience during the germination process. Avoid disturbing the seeds or rushing to transplant them prematurely. Check the moisture levels and the progress daily, but remember that seeds sprout at their own pace, depending on factors such as genetics, age, and the conditions they are exposed to.
-
Effective and Easy Monitoring
One of the greatest advantages of using the coffee filter method is the ability to easily monitor your seeds. Unlike germinating in soil or other mediums, where the seeds are buried and hidden from view, the coffee filter method allows you to observe the entire germination process. This transparency makes it easier to spot potential issues early, such as seeds drying out or developing mold, and make quick adjustments to keep the environment ideal.
This method, when executed properly, is a simple, low-cost, and highly effective way to germinate cannabis seeds. With careful monitoring and a little patience, you can significantly improve the likelihood of strong, healthy seedlings ready to be transplanted into their growing medium.

Part 4: The Disadvantages of Germinating Cannabis Seeds with Unbleached Coffee Filters
Downsides of Germinating Cannabis Seeds with Unbleached Coffee Filters
Using unbleached coffee filters to germinate cannabis seeds is cheap and popular. Many home growers use this method. But like any method, it has downsides too. If you know the risks, you can decide if it fits your growing style. Let’s go over the main disadvantages.
1. Risk of Damaging the Taproot
The biggest problem? Damaging the taproot during transplant. The taproot is the first root that pops out. It’s thin and delicate.
Once it grows, you must move the seedling into soil. That step can easily go wrong. One small mistake can snap the root. If that happens, your plant might stop growing or die.
Coffee filters sometimes stick to the root. If they dry out, the root can grow into the paper. Then separating them gets tricky. You need to handle them gently. Use tweezers or gloves to avoid damage. New growers often find this part stressful and risky.
2. Hard to Keep the Filter Moist
Seeds need moisture to germinate. But keeping the filter “just moist enough” can be tough. Too dry? The seeds stop growing. Too wet? Mold forms, or the seeds rot.
Finding the right balance takes practice. You need to check often and rewet the filter as needed. That can take time and energy, especially in places with changing humidity or temperature.
3. Low Oxygen Flow
Seeds also need air to germinate. If you wrap them in a damp filter and seal the setup, they may lack oxygen. That slows germination or stops it completely.
To fix this, you can leave a plastic bag slightly open or use two plates with some air space. But again, you must balance airflow and moisture. That’s not always easy.
4. Mold Can Grow Fast
Mold loves warm, wet places. And that’s exactly the environment inside a moist coffee filter. If things get too wet or stuffy, mold may grow on the seeds or filter.
Mold can kill your seeds before they sprout. And once it starts, it spreads fast. To stop mold, you need good airflow and moisture control. That can be hard, especially in humid spaces.
5. More Work and Daily Checks
This method takes more time than some other options. You have to check it every day. Is the filter too dry? Too wet? Any signs of mold?
Once seeds sprout, you must move them carefully into soil. That step takes patience and precision. If you have many seeds, this gets tiring. Some growers prefer a “set it and forget it” system. For them, this method feels like too much hands-on work.
6. Not Great for Big Grow Ops
Coffee filters work fine if you germinate a few seeds at home. But it doesn’t scale well. Try doing this with 50 or 100 seeds. It gets messy, fast.
You’ll need many filters, lots of space, and constant attention. That doesn’t work for bigger grows. Large setups do better with seed trays, plugs, or automatic systems. Those methods save time and make it easier to germinate large numbers.
Germinating cannabis seeds using unbleached coffee filters Final Thoughts
The coffee filter method works. It’s cheap and simple. But it’s not perfect. It takes time, care, and a gentle touch. If you only grow a few plants, it might be perfect. But for bigger or busier growers, another method might work better. Choose what fits your style best.
Conclusion Germinating cannabis seeds using unbleached coffee filters:
Cannabis seeds germinating using unbleached coffee filters offers a simple, affordable, and effective way to sprout seeds. But it also comes with several disadvantages. These include the potential for root damage during transplant and difficulties in maintaining consistent moisture levels. For small-scale growers with time to closely monitor the process, the coffee filter method can be a great choice. However, for those seeking a more hands-off or large-scale solution, alternative germination methods may be better suited to their needs.
Read more about other ways to germinate cannabis seeds here:
The best cannabis seeds germination method
Germinating Cannabis Seeds with Hydrogen Peroxide
Dont do wet tissue germination method!
Cannabis Seeds Germination Timelapse
Cannabis Germination on Hydro Video
Dutchfem Bubble haze timelapse video


")


You must be logged in to post a comment.